Irresistibly Sweet and Oh-So-Tempting!
I remember the first time I made 7-Layer Bars (Magic Cookie Bars) on a whim. With just a handful of simple ingredients, I was amazed at how easily these bars came together, and the delightful layers of graham cracker, chocolate chips, and coconut created a symphony of flavors that had everyone raving. They quickly became my go-to treat for any occasion.
What makes these bars truly special is the intoxicating aroma that fills your kitchen as they bake, wrapping you in warmth and nostalgia. Watching friends and family take their first bite, their eyes lighting up with joy, is pure magic—perfect for cozy dinners or even spontaneous gatherings. Whether it’s a busy weekday or a relaxed weekend, these treats bring smiles every time.
To elevate your 7-Layer Bars (Magic Cookie Bars), consider serving them warm with a scoop of vanilla ice cream or drizzling some chocolate sauce on top. Enjoying them while reminiscing about sweet moments creates an experience that lingers long after the last bite. Trust me; once you taste these layered delights, you’ll find every excuse to whip up another batch!
What are 7-Layer Bars (Magic Cookie Bars)?
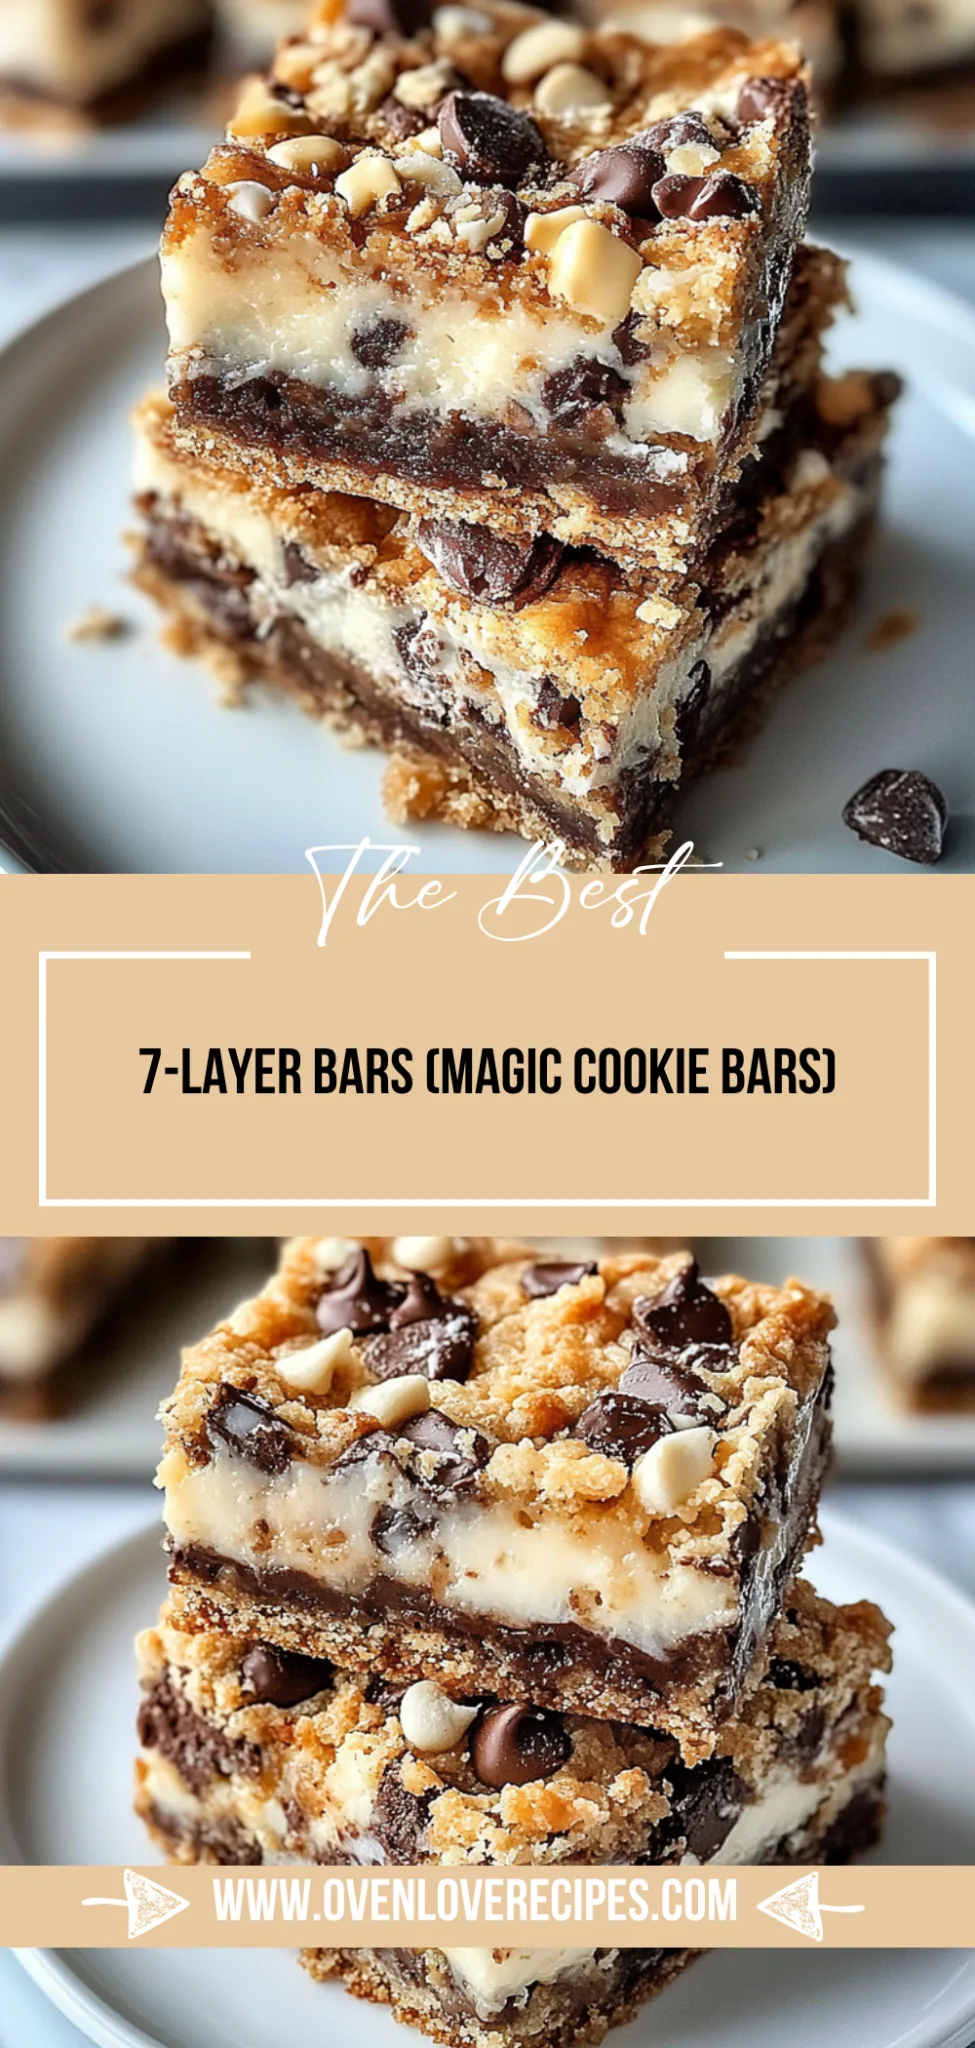
7-Layer Bars, also known as Magic Cookie Bars, are a delightful dessert that combines layers of rich flavors and textures into one scrumptious treat. With a buttery graham cracker crust serving as the base, these bars are filled with an irresistible combination of semi-sweet chocolate chips, butterscotch chips, sweetened shredded coconut, and chopped nuts, all bound together with sweetened condensed milk. The result is a crispy exterior that gives way to a chewy and gooey interior, making each bite a perfect balance of sweetness and crunch. Baked in the oven in just one pan, these bars are not only easy to make but also simplify cleanup, allowing you to enjoy your delicious creation with minimal effort!
Perfect For:
Easy Weeknight Treat: These 7-Layer Bars come together quickly and require minimal prep, making them the perfect sweet fix after a busy day.
Budget-Friendly Dessert: With simple pantry ingredients like graham crackers and chocolate chips, you can create a decadent dessert without breaking the bank.
Crowd-Pleasing Snack: Whether for a bake sale or family gathering, these bars are easy to slice and serve, ensuring everyone gets a taste of that delightful layered goodness.
Comforting Indulgence: On a cozy night in or during movie marathons, these rich and chewy bars offer the perfect blend of flavors that will wrap you in a warm hug.
7-Layer Bars (Magic Cookie Bars) Ingredients
For the Crust
- 1 cup graham cracker crumbs – This forms the sweet base of your bars, providing a delightful crunch.
- 1/2 cup unsalted butter (melted) – The melted butter binds the crumbs together, adding richness to the crust.
For the Layers
- 1 cup chocolate chips (semi-sweet) – These add a luscious chocolate flavor that perfectly complements the other layers.
- 1 cup butterscotch chips – They bring a sweet, buttery taste that balances beautifully with the chocolate.
- 1 cup sweetened shredded coconut – This adds a chewy texture and tropical flair to your 7-Layer Bars (Magic Cookie Bars).
- 1 cup chopped nuts (walnuts or pecans) – Nuts provide a satisfying crunch and nutty flavor that enhances each bite.
- 1 can sweetened condensed milk (14 oz) – This creamy milk ties all the layers together, creating a gooey, irresistible treat.
Kitchen Equipment You’ll Need
- Mixing bowl
- 9×13 inch baking pan
- Rubber spatula or wooden spoon
- Measuring cups
- Oven mitts
- Cooling rack
How to Make 7-Layer Bars (Magic Cookie Bars)
Step 1:
Preheat your oven to 350°F (175°C) to ensure it’s nice and hot when you’re ready to bake. This temperature is perfect for creating that golden-brown crust we all love in these magic cookie bars.
Step 2:
In a mixing bowl, combine 1 cup of graham cracker crumbs with 1/2 cup of melted unsalted butter. Stir until the crumbs are fully coated and the mixture resembles wet sand. This will form the base of your bars, so make sure it’s well mixed!
Step 3:
Press the crumb mixture firmly into the bottom of a greased 9×13 inch baking pan. Use your fingers or the back of a measuring cup to create an even layer, ensuring it’s packed tightly for a sturdy crust that will hold everything together.
Step 4:
Now it’s time to layer in the goodness! Evenly sprinkle 1 cup each of semi-sweet chocolate chips, butterscotch chips, sweetened shredded coconut, and chopped nuts over the crust. Make sure every corner gets some love; this is what makes each bite so deliciously exciting!
Step 5:
Next, pour the entire can of sweetened condensed milk evenly over the top of your layered ingredients. This will act as a binding agent and add a luscious sweetness that melds all the flavors beautifully together.
Step 6:
Bake in your preheated oven for about 25 minutes or until you see the edges turn a lovely golden brown. Keep an eye on them towards the end—this is when they start smelling heavenly!
Step 7:
Once baked, remove the pan from the oven and let it cool completely before cutting into bars. Patience is key here; letting them cool will help set everything perfectly for easy slicing!
Tips
- Use fresh ingredients: Opt for fresh nuts and high-quality chocolate chips to ensure maximum flavor in your bars. Stale ingredients can dull the taste and texture of your delicious layers.
- Crush graham crackers finely: The finer the graham cracker crumbs, the better they will adhere together, resulting in a sturdy crust. A well-compressed crust holds up when you cut into the bars, preventing them from falling apart.
- Cool completely before cutting: Allow the bars to cool completely in the pan before slicing. This helps them set properly and makes it easier to achieve clean cuts without crumbling.
- Adjust baking time for desired texture: Keep an eye on the baking time if you prefer a softer or chewier texture. Baking just until golden brown will yield a gooey center, while longer baking creates a firmer bar.
- Grease the pan generously: Ensure you use enough grease or parchment paper in your baking pan to prevent sticking. A well-greased pan makes it easy to lift out the bars and achieve a perfect presentation.
- Layer strategically for balance: Distribute chocolate, butterscotch chips, coconut, and nuts evenly over the crust for balanced flavors in each bite. This ensures every layer complements one another without overwhelming any single flavor.
Optional Ingredients
- Cream Cheese: Adding a layer of softened cream cheese can introduce a rich, tangy flavor that beautifully contrasts with the sweetness of the bars. Spread it evenly over the crust before layering the other ingredients.
- Cayenne Pepper: For those who enjoy a kick, a sprinkle of cayenne pepper can add a surprising heat that elevates the overall flavor profile. Mix a pinch into your chocolate or butterscotch chips for an unexpected twist.
- Dried Cherries or Cranberries: These dried fruits can contribute a burst of tartness and chewiness, providing a lovely contrast to the sweetness. Scatter them atop the layers before baking for added flavor and visual appeal.
- Lime Zest: A touch of lime zest can bring brightness and freshness to your 7-Layer Bars, cutting through the richness. Simply grate some lime peel over the top before serving to enhance the flavors.
- Caramel Sauce: Drizzling warm caramel sauce on top adds an indulgent touch of sweetness and creates an inviting look. Use it as a finishing drizzle just before serving for that extra wow factor.
What to Pair with 7-Layer Bars (Magic Cookie Bars)?
To balance the richness of 7-Layer Bars, consider serving a fresh salad as a light starter. A mixed greens salad with tangy vinaigrette can cut through the sweetness and provide a refreshing contrast. Adding elements like sliced strawberries or citrus segments will enhance the experience, providing brightness that complements the decadent layers of chocolate and coconut.
Another delightful pairing is steamed or roasted vegetables, such as asparagus or Brussels sprouts. The earthy flavors and slight bitterness of these vegetables serve as a wonderful counterbalance to the bars’ sweet profile. Drizzling them with a touch of balsamic glaze can elevate the dish further, adding depth that harmonizes beautifully with the dessert.
For a comforting side, think about fluffy mashed potatoes or creamy polenta. These sides offer a rich, velvety texture that contrasts nicely with the crunchy nuts in the bars. Plus, their buttery essence creates a sense of warmth that rounds out your meal perfectly without competing for attention against the sweet layers of the 7-Layer Bars.
Lastly, consider pairing your bars with a chilled glass of sweet iced tea or even a dessert wine like Moscato. The floral notes and gentle sweetness of these drinks enhance the complex flavors found within each layer of the bars. This combination not only refreshes but also prolongs the indulgent experience of enjoying your 7-Layer Bars, making every bite feel special.
Variations and Substitutions
Chocolate cookie crust: Swap out the graham cracker crumbs for crushed chocolate cookies, like Oreos, for a richer, more decadent flavor. This change enhances the chocolatey goodness of your 7-layer bars and adds an extra layer of indulgence.
Vegan butter alternative: Use coconut oil or a plant-based buttery spread in place of unsalted butter for a vegan-friendly option. This substitution keeps the bars moist while lending a subtle coconut flavor that beautifully complements the other elements.
Almonds instead of walnuts: Replace walnuts or pecans with chopped almonds for a nuttier crunch. Almonds not only add a delightful texture but also infuse the bars with a slightly sweet, buttery flavor that pairs perfectly with the chocolate and coconut.
Dark chocolate chips: Opt for dark chocolate chips instead of semi-sweet for a more intense chocolate flavor. This variation offers a sophisticated taste profile and balances the sweetness of butterscotch chips and sweetened condensed milk, making it perfect for dark chocolate lovers.
Unsweetened shredded coconut: For those who prefer less sweetness, use unsweetened shredded coconut. This will create a more balanced flavor in your bars and allow the richness from the condensed milk to shine through without being overly sweet.
Nut-free option: Omit the nuts entirely to create nut-free 7-layer bars that are safe for those with nut allergies. You can replace them with additional layers of coconut or even mini marshmallows to maintain that delightful chewy texture.
To store your 7-Layer Bars in the refrigerator, allow them to cool completely at room temperature before transferring them to an airtight container. They’ll stay fresh for about a week. When you’re ready to enjoy them again, you can gently reheat individual squares in the microwave for about 10-15 seconds to restore some of their gooeyness, but be careful not to overheat, as this can change the texture.
These bars also freeze well, although the texture may become slightly firmer when thawed. To freeze, cut the bars into portions and wrap each piece tightly in plastic wrap or aluminum foil before placing them in a freezer-safe container. They can be stored in the freezer for up to three months. To thaw, simply transfer them to the refrigerator overnight or leave them at room temperature for a few hours before reheating as desired.
FAQ
Can I use a different type of nut for the 7-Layer Bars?
Absolutely! While walnuts and pecans are popular choices, you can substitute them with any nuts you prefer, such as almonds or hazelnuts. Just make sure to chop them into smaller pieces for even distribution.
How do I ensure my graham cracker crust holds together well?
To ensure your graham cracker crust holds together, make sure the melted butter is evenly mixed with the crumbs. Press the mixture firmly into the baking pan, creating a compact base that will hold its shape during baking.
Can I use sugar-free sweetened condensed milk in this recipe?
Yes, you can use sugar-free sweetened condensed milk as a substitute. However, keep in mind that it may alter the flavor slightly since it won’t be as rich and sweet as the regular version.
How do I know when my 7-Layer Bars are fully baked?
Your bars are fully baked when they turn golden brown on top. Additionally, a toothpick inserted in the center should come out mostly clean, though some gooeyness from the chocolate and butterscotch chips is normal.
Can I prepare the crust ahead of time?
Yes, you can prepare the crust ahead of time. Once it’s pressed into the pan, cover it with plastic wrap and store it in the refrigerator for up to 24 hours before adding the layers and baking.
Is it possible to make these bars gluten-free?
Definitely! To make gluten-free 7-Layer Bars, simply use gluten-free graham cracker crumbs instead of traditional ones. The other ingredients listed are naturally gluten-free, ensuring a delicious treat for everyone.
Can I make these bars in advance and freeze them?
Yes, these bars freeze well! After they’ve cooled completely, cut them into squares and store them in an airtight container or freezer bag. They can be kept frozen for up to three months; just thaw them at room temperature before serving.
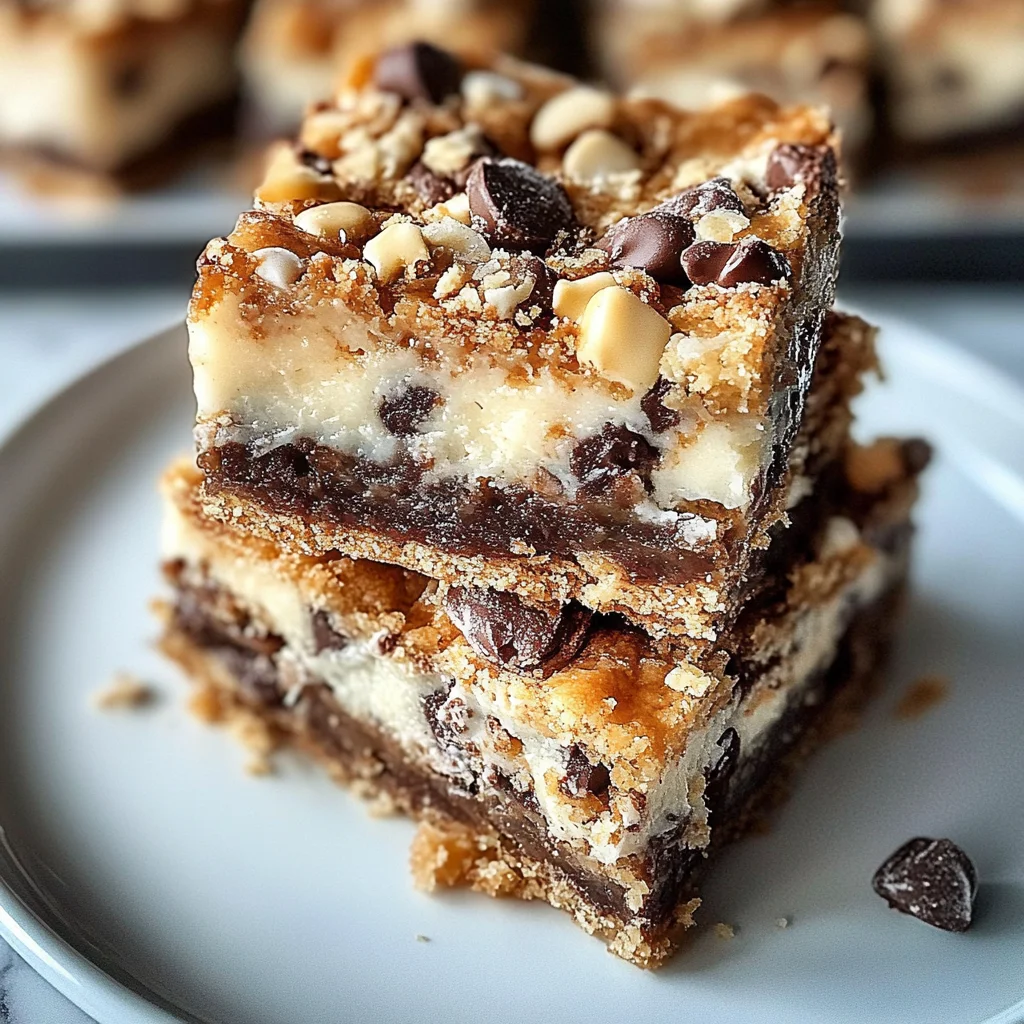
7-Layer Bars (Magic Cookie Bars)
Ingredients
Method
- Preheat the oven to 350°F (175°C).
- In a mixing bowl, combine graham cracker crumbs and melted butter.
- Press the mixture into the bottom of a greased 9x13 inch baking pan.
- Evenly sprinkle chocolate chips, butterscotch chips, coconut, and nuts over the crust.
- Pour the sweetened condensed milk evenly over the top.
- Bake in the preheated oven for 25 minutes or until golden brown.
- Remove from oven and let cool completely before cutting into bars.
Leave a Comment