A Whimsical Twist on Dessert Delight
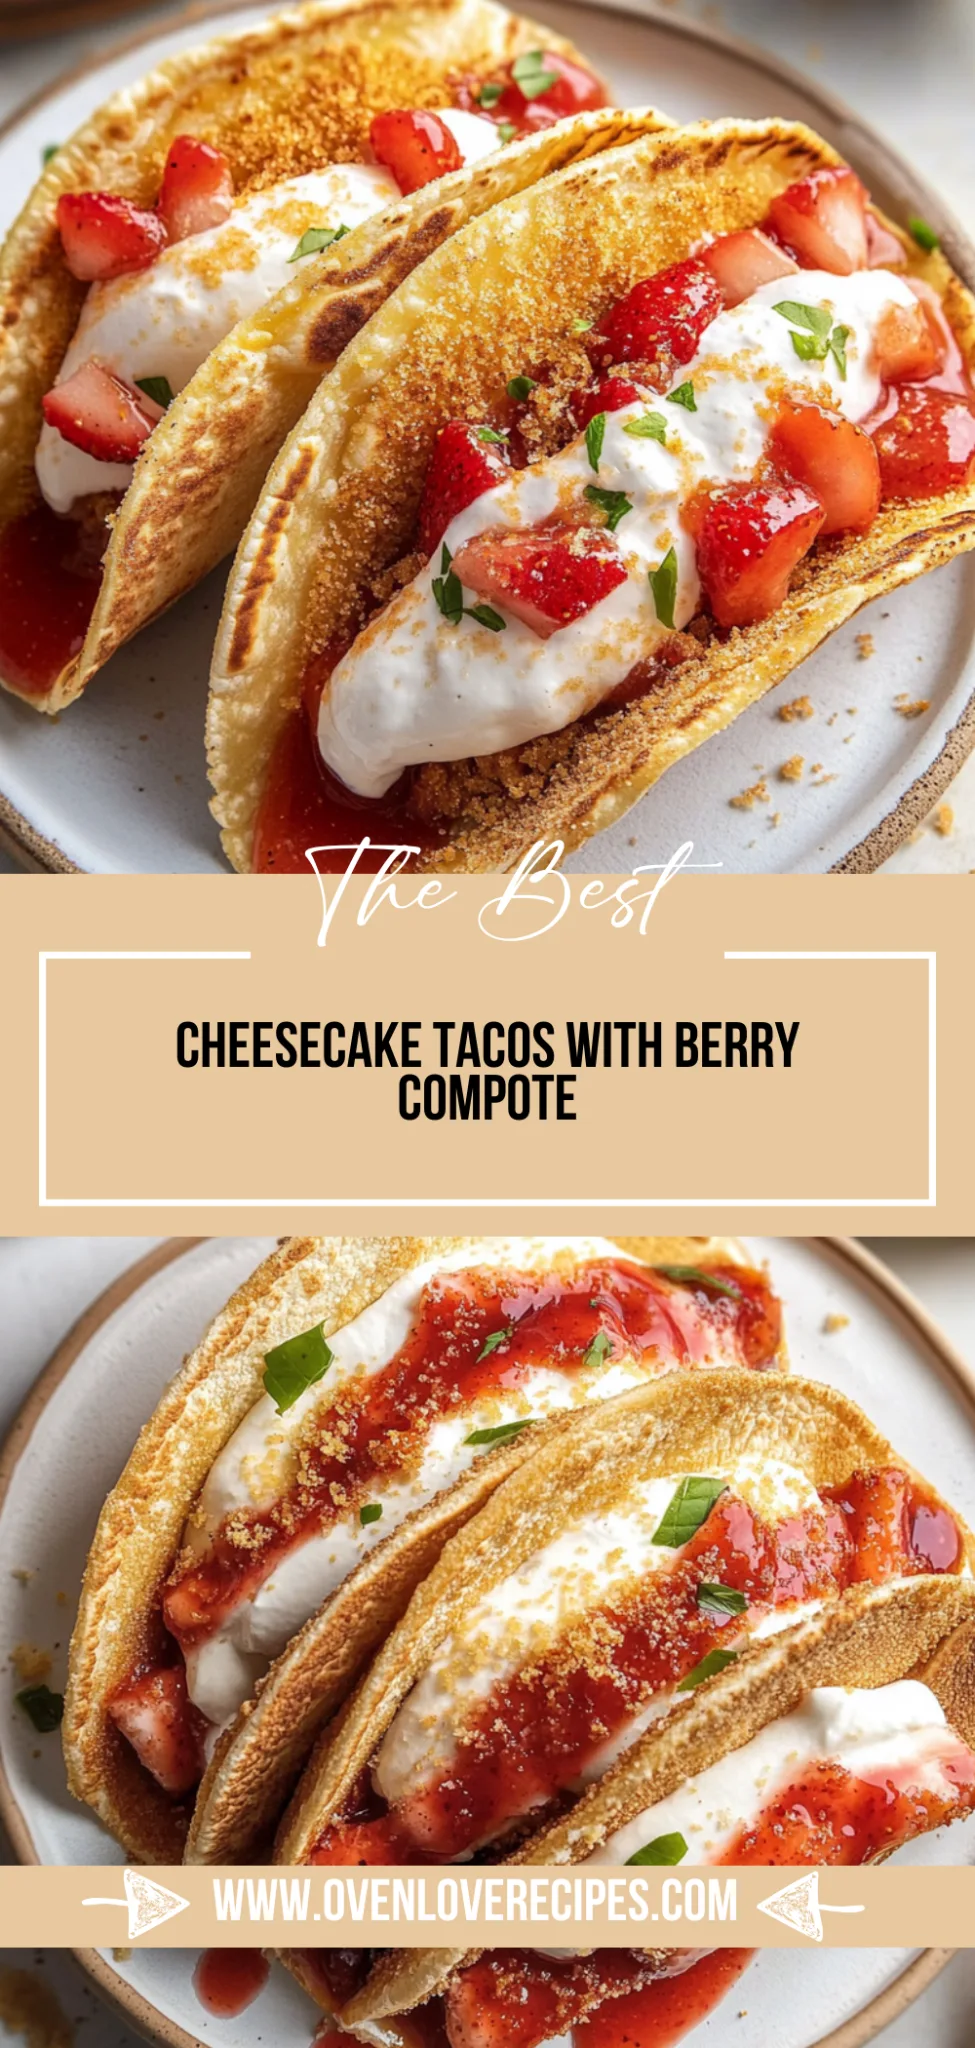
I first stumbled upon the idea of Cheesecake Tacos during a cozy gathering with friends, and I knew I had to try my hand at this fun twist on a classic dessert. With a crispy taco shell cradling velvety cheesecake filling, each bite is an explosion of flavor and texture that leaves everyone craving more. It’s incredibly easy to whip up, making it the perfect treat for any occasion.
What makes these Cheesecake Tacos truly special is the way they fill the air with a sweet aroma that draws everyone in, sparking smiles and excitement. They’re perfect for date nights when you want to impress or for casual gatherings where you want to share something unique and delightful. Watching your loved ones take their first bite and see their eyes light up is an experience like no other.
To enjoy these delightful treats, consider serving them alongside a refreshing fruit salad or a scoop of vanilla ice cream for an extra touch of indulgence. Top them off with fresh berries, chocolate drizzle, or crushed nuts for added flair. Trust me, once you take that first bite, you’ll find yourself dreaming up excuses to make these Cheesecake Tacos again and again!
What are Cheesecake Tacos?
Cheesecake Tacos are a delightful twist on the classic dessert, combining the rich, creamy filling of cheesecake with a fun taco shell format. Made with softened cream cheese, sugar, and a hint of vanilla extract, the filling is lightened with whipped cream for a fluffy texture that perfectly contrasts with the crispy taco shells made from all-purpose flour and butter. Each bite offers a satisfying crunch followed by a luscious creaminess, making them both indulgent and refreshing. This easy-to-make treat can be prepared in one pan, allowing for minimal cleanup while you experiment with various toppings like fresh strawberries, blueberries, or drizzles of caramel sauce to customize your dessert experience.
Perfect For:
Family Fun Nights: Cheesecake Tacos turn dessert into an interactive experience, where everyone can customize their own taco with their favorite toppings, making it a hit for family gatherings.
Budget-Friendly Treats: With simple ingredients and easy preparation, you can enjoy the delightful taste of cheesecake without breaking the bank, perfect for those sweet cravings on a budget.
Celebrating Special Occasions: Whether it’s a birthday or a casual get-together, these colorful and creative tacos will impress your guests and add a fun twist to traditional dessert offerings.
Cozy Movie Nights: Snuggling up with a plate of Cheesecake Tacos is the ultimate comfort food experience, combining the richness of cheesecake with the playful fun of tacos—ideal for a night in!
Ingredients for Cheesecake Tacos
For the Cheesecake Filling
- 8 oz cream cheese (softened) – Make sure it’s softened to room temperature for easy mixing and a smooth texture.
- 1/2 cup sugar – This sweetener balances the tangy cream cheese perfectly.
- 1 tsp vanilla extract – Adds a warm, aromatic flavor to your cheesecake filling.
- 1 cup whipped cream (for folding in) – Lightens the filling for a fluffy, airy consistency.
For the Taco Shells
- 1 cup all-purpose flour – Forms the base of your taco shell, providing structure and stability.
- 1/2 cup butter (melted) – Ensures a rich flavor and helps create a tender shell.
- 1/4 cup sugar – Sweetens the taco shells just enough to complement the cheesecake filling.
- 1 large egg – Binds all ingredients together for a cohesive dough.
- 1 tsp baking powder – Helps the shells rise slightly while baking for a light texture.
- 1/4 tsp salt – Enhances all flavors and balances sweetness.
For the Toppings
- 1/2 cup fresh strawberries (sliced) – Adds a refreshing, fruity burst to each bite of your Cheesecake Tacos.
- 1/2 cup blueberries – Provides vibrant color and antioxidant-packed goodness on top.
- 1/4 cup chocolate chips – Introduces a delightful melty richness when sprinkled over the tacos.
- 1/4 cup caramel sauce (for drizzling) – A sweet finishing touch that ties all elements together beautifully.
Kitchen Equipment You’ll Need
- Mixing bowl
- Electric mixer or whisk
- Taco shell mold
- Baking sheet
- Spatula
How to Make Cheesecake Tacos
Step 1:
In a mixing bowl, start by beating the softened cream cheese, sugar, and vanilla extract together until the mixture is smooth and creamy. This step is crucial for achieving that luscious cheesecake filling, so take your time and make sure there are no lumps in the mixture.
Step 2:
Once your cream cheese mixture is smooth, gently fold in the whipped cream until fully combined. Be careful not to overmix; you want to maintain that light and airy texture that makes cheesecake so delightful.
Step 3:
Preheat your oven to 350°F (175°C) to get it nice and hot while you prepare the taco shells. This temperature is perfect for creating a golden-brown shell that will hold your cheesecake filling beautifully.
Step 4:
In a separate bowl, mix together the all-purpose flour, melted butter, sugar, egg, baking powder, and salt until a dough forms. It should be slightly sticky but manageable — this dough will become your tasty taco shells.
Step 5:
Using a taco shell mold, shape the dough into taco shells and place them on a baking sheet. Make sure they’re evenly spaced out to allow for even cooking.
Step 6:
Bake the taco shells in your preheated oven for about 8-10 minutes or until they turn golden brown. Keep an eye on them towards the end of baking; you want them crisp but not burnt. Once done, let them cool completely before filling.
Step 7:
Now it’s time to fill each cooled taco shell with your delicious cheesecake filling. Use a spoon or piping bag for easy assembly — whichever you prefer!
Step 8:
Top each filled taco with sliced strawberries, blueberries, chocolate chips, and finish with a drizzle of caramel sauce. Get creative with the toppings; this is where you can really make each taco unique!
Step 9:
Serve your cheesecake tacos immediately for the best flavor and texture. Enjoy every bite of this fun twist on traditional cheesecake!
Tips
- Soften your cream cheese: Ensure your cream cheese is at room temperature before mixing; this prevents lumps and creates a smooth, creamy filling that’s easy to fold in the whipped cream.
- Chill the filling: After preparing the cheesecake filling, refrigerate it for about 30 minutes before assembling. This helps it firm up slightly, making it easier to fill the taco shells without spilling.
- Don’t overmix the filling: When folding in the whipped cream, mix just until combined. Overmixing can deflate the air bubbles, leading to a denser filling instead of a light and fluffy texture.
- Check taco shell color: Keep an eye on the taco shells while baking; they should be golden brown. Undercooked shells may not hold their shape well when filled, while overbaked ones can become too hard to bite into.
- Allow shells to cool completely: Let your taco shells cool fully after baking before adding the filling. Warm shells can soften the cheesecake mixture and make it messy to eat.
- Add toppings just before serving: To keep your cheesecake tacos fresh and maintain their texture, add toppings like strawberries and chocolate chips right before serving rather than in advance. This ensures they stay vibrant and crunchy!
Optional Ingredients
- Mascarpone cheese: Substitute or mix in with the cream cheese for a richer, creamier texture that enhances the overall decadence of your cheesecake filling.
- Cayenne pepper: A pinch of this spice adds a subtle heat that beautifully contrasts the sweetness of the cheesecake and toppings. Use sparingly to avoid overpowering the dessert.
- Shredded coconut: Toss in some unsweetened shredded coconut for a chewy texture and tropical flair that complements the creamy filling and crunchy taco shell.
- Lemon zest: Grate fresh lemon zest into the cheesecake mixture for a bright, citrusy note that cuts through the richness and elevates the flavor profile.
- Chocolate sauce: Drizzle some warm chocolate sauce over the finished tacos for an indulgent touch that pairs perfectly with the fruity toppings and adds a luscious finish.
What to Pair with Cheesecake Tacos?
To complement the sweetness of Cheesecake Tacos, a fresh salad serves as the perfect light starter. Consider a mixed green salad with arugula, cherry tomatoes, and a tangy citrus vinaigrette. The peppery notes of arugula and the acidity from the dressing provide a refreshing contrast that balances the rich creaminess of the cheesecake filling.
For a comforting side, roasted sweet potatoes can be an excellent choice. Their natural sweetness harmonizes beautifully with the dessert’s flavors, while their soft texture adds a nice contrast to the crunchy taco shell. Tossed with a little cinnamon and honey, these sweet potatoes elevate your meal without overwhelming your palate.
When it comes to drinks, sparkling lemonade is a delightful pairing that enhances the festive nature of Cheesecake Tacos. The effervescence refreshes your palate and complements the dessert’s creamy richness, while its citrus notes bring out the vanilla essence in the cheesecake. Alternatively, a light-bodied white wine like Moscato can also add a sweet touch, creating an indulgent yet balanced dining experience.
Variations and Substitutions
Greek Yogurt instead of Cream Cheese: Swap out the cream cheese for Greek yogurt for a tangy, lighter cheesecake filling. This substitution adds a creamy texture while reducing calories, making your dessert feel a bit healthier without sacrificing flavor.
Honey in place of Sugar: Use honey instead of sugar to sweeten your cheesecake filling. The natural sweetness of honey gives a floral note that complements the vanilla and enhances the overall flavor profile, creating a delightful variation that feels more sophisticated.
Almond Flour Taco Shells: For a gluten-free version, substitute all-purpose flour with almond flour. This change results in a nutty flavor and slightly denser texture that pairs beautifully with the creamy cheesecake filling while accommodating those with gluten sensitivities.
Coconut Whipped Cream instead of Regular Whipped Cream: Replace regular whipped cream with coconut whipped cream to introduce a tropical flair to your cheesecake tacos. This dairy-free option not only brings a subtle coconut flavor but also adds an exotic twist that makes your dessert feel like a mini vacation.
Lemon Zest added to the Filling: Incorporate lemon zest into your cheesecake filling for a refreshing citrus burst. This brightens the flavors and balances the sweetness, making each bite feel invigorating and perfect for warm-weather gatherings.
Peanut Butter Swirl for Extra Richness: Fold in some creamy peanut butter into the cheesecake filling for an indulgent twist. The rich, nutty flavor enhances the overall taste and creates a luscious texture that is absolutely irresistible to chocolate lovers when paired with chocolate chips on top.
Chili Chocolate Drizzle in place of Caramel Sauce: Try drizzling chili-infused chocolate sauce instead of caramel for an exciting kick. This spicy-sweet variation adds depth and complexity, transforming your cheesecake tacos into a daring dessert adventure that will surprise and delight your taste buds.
How to Store
To store your Cheesecake Tacos in the refrigerator, allow them to cool completely before placing them in an airtight container. Layer the taco shells and cheesecake filling separately to prevent sogginess, and they will keep well for up to 3 days. When you’re ready to enjoy them again, simply let the shells sit at room temperature for a few minutes before assembling with fresh toppings for the best texture.
Cheesecake Tacos do freeze reasonably well, but keep in mind that the taco shells may become slightly softer once thawed. To freeze, wrap each assembled taco tightly in plastic wrap and place them in a freezer-safe container or bag, ensuring you remove as much air as possible. They can be stored frozen for up to 2 months; when you’re ready to eat them, thaw overnight in the refrigerator and re-crisp the shells in a preheated oven at 350°F for about 5 minutes before adding your toppings.
Frequently Asked Questions
Can I use a different type of cheese for the cheesecake filling?
Yes, you can experiment with different cheeses such as mascarpone or ricotta for a unique flavor. Just keep in mind that the texture may vary slightly, so it’s best to blend them well until smooth.
How do I ensure my taco shells are crispy?
To achieve crispy taco shells, make sure to bake them until they are golden brown. Allowing them to cool completely after baking will also help maintain their crunchiness when filled.
Can I prep the cheesecake filling ahead of time?
Absolutely! You can prepare the cheesecake filling a day in advance and store it in the refrigerator. Just be sure to fill the taco shells right before serving for optimal freshness.
Is there a gluten-free option for the taco shells?
Yes, you can make gluten-free taco shells by substituting all-purpose flour with a gluten-free flour blend. Make sure to check that all other ingredients used are also gluten-free.
How long will the assembled cheesecake tacos last in the fridge?
Assembled cheesecake tacos are best enjoyed immediately, but if stored in an airtight container, they can last up to 2 days in the fridge. However, the taco shells may become soft over time.
Can I add other toppings besides those listed?
Definitely! Feel free to get creative with your toppings. Consider adding fruits like raspberries or bananas, nuts, or even whipped cream for extra flavor and texture.

Leave a Comment