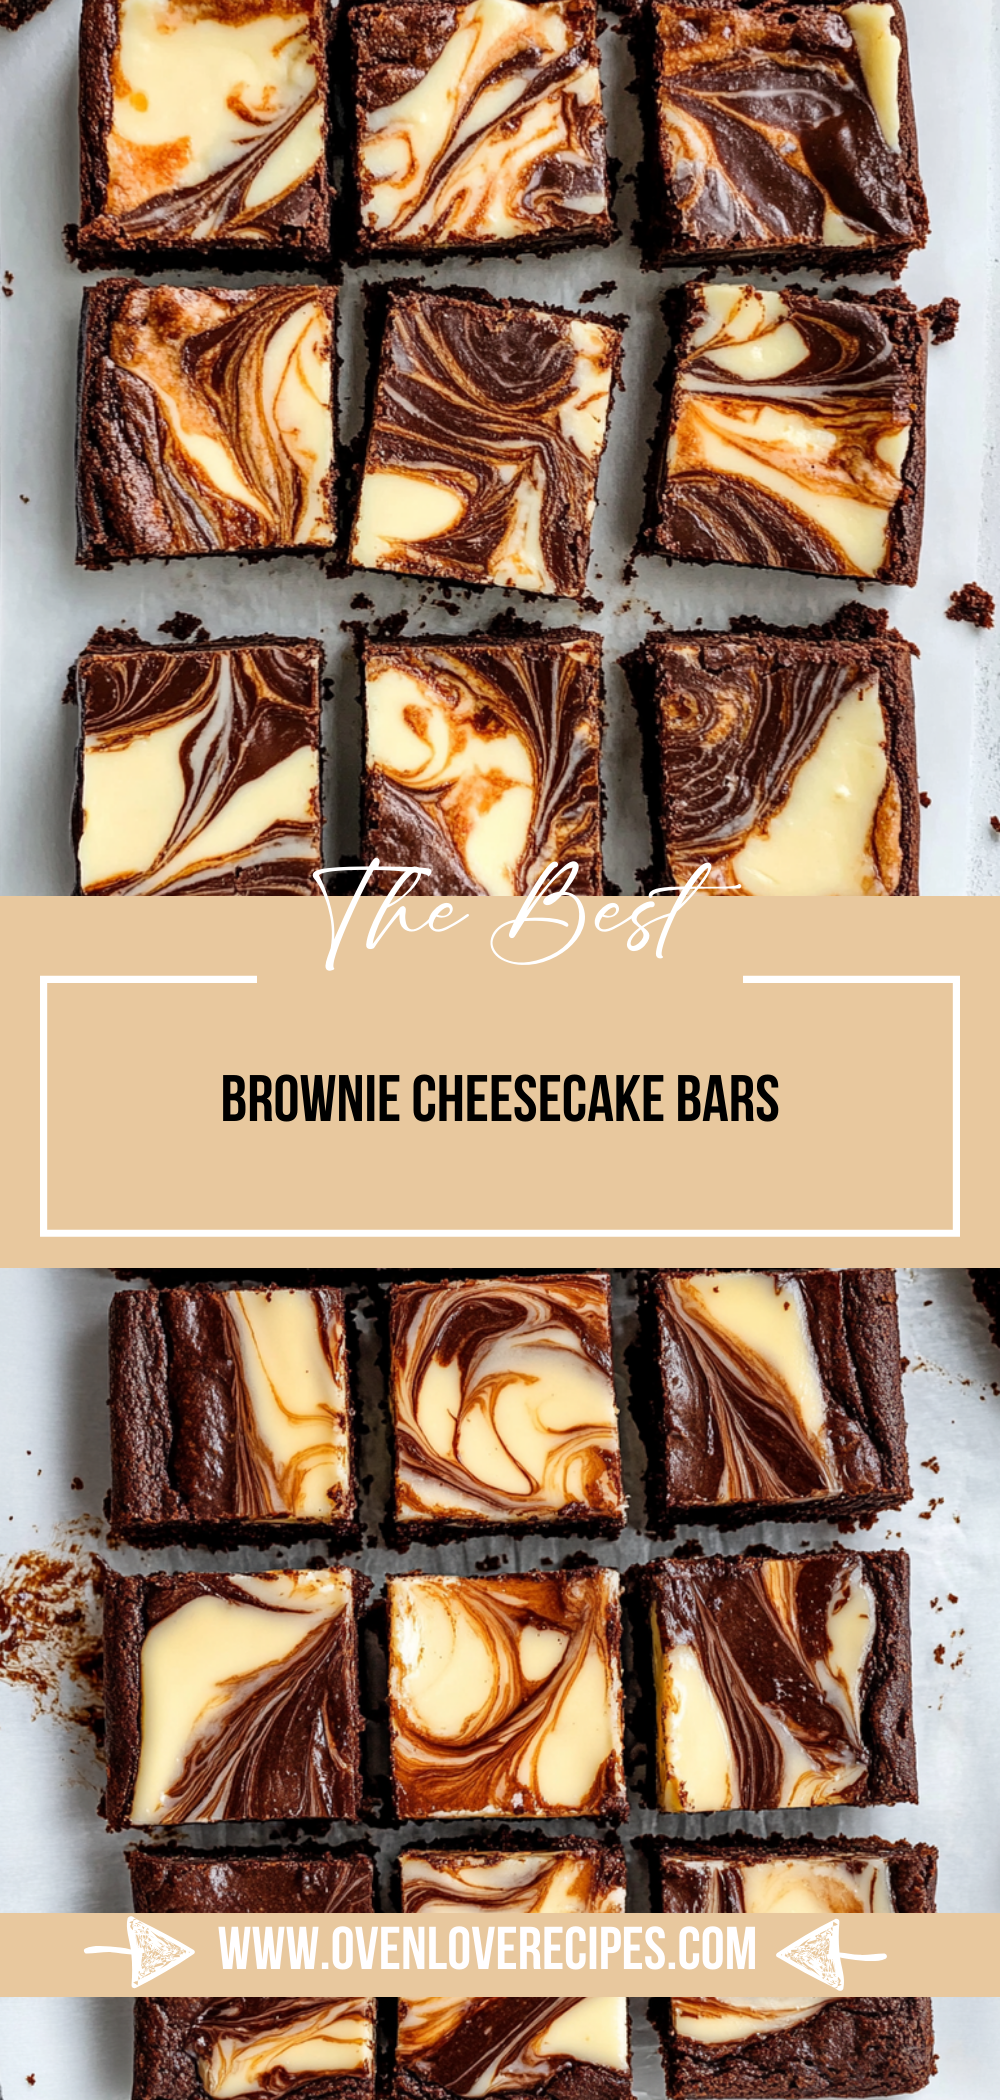
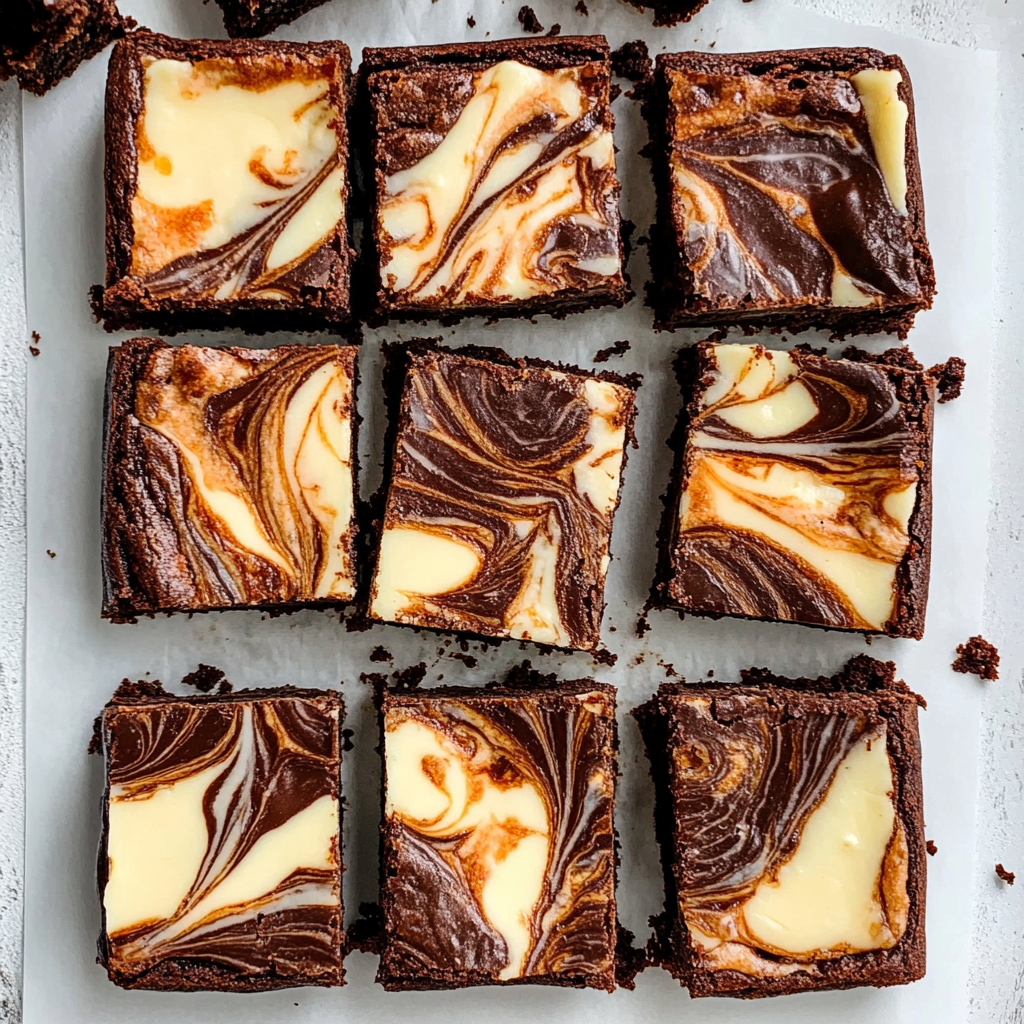
There’s something truly magical about the combination of rich chocolate and creamy cheesecake, and these Brownie Cheesecake Bars embody that magic perfectly. With a luscious brownie base topped with a velvety cheesecake layer and finished off with a decadent Oreo-studded chocolate ganache, they are sure to steal the show at any gathering. Whether you’re hosting a birthday party, bringing dessert to a potluck, or simply treating yourself on a cozy evening at home, these bars are a delightful choice.
What I love most about this recipe is how it effortlessly blends different textures and flavors into one bite-sized treat. It’s reliable and easy to make, ensuring you’ll impress your friends and family without spending hours in the kitchen. Get ready to indulge in these scrumptious Brownie Cheesecake Bars!
Why You’ll Love This Recipe
– A delightful combination: The rich brownie base pairs perfectly with the smooth cheesecake layer for an irresistible treat.
– Great for sharing: With 16 generous servings, these bars are perfect for parties or family gatherings.
– Simple ingredients: You likely have most of the ingredients on hand already, making this an easy go-to recipe.
– Versatile treat: Dress them up with toppings or serve them plain; they’re delicious either way!
– Make-ahead friendly: These bars can be prepared in advance, allowing you to enjoy stress-free entertaining.
Ingredients You’ll Need
Gathering your ingredients is half the fun! Here’s what you’ll need to create these mouthwatering Brownie Cheesecake Bars:
For the Brownie Base
– 1 box brownie mix (for 9×13 pan)
– 22 oreos (divided)
For the Cheesecake Layer
– 8 ounces cream cheese (softened)
– 1 large egg
– 1 teaspoon vanilla extract
– 1/4 cup granulated sugar
– 2 Tablespoons sour cream
For the Ganache Topping
– 1/4 cup chocolate chips
– 1/4 cup heavy whipping cream
Variations
Flexibility is key when it comes to baking! Here are some fun variations you can try to make these Brownie Cheesecake Bars your own:
– Swap the cookies: Use chocolate sandwich cookies or any favorite cookie instead of Oreos for a unique flavor twist.
– Change up the flavors: Add in some peppermint extract for a refreshing minty version or use orange zest for a citrusy kick.
– Top with fruit: Fresh berries or sliced bananas can add a fruity touch that pairs beautifully with the chocolate and cheesecake.
– Make it gluten-free: Substitute the brownie mix with a gluten-free version to accommodate dietary preferences.
How to Make Brownie Cheesecake Bars
Now let’s get into the fun part—making these delicious Brownie Cheesecake Bars!
Step 1: Prepare the Brownie Base
Start by preheating your oven according to the brownie mix instructions. Grease your 9×13-inch baking pan so that those delicious bars come out easily later. Prepare the brownie mix as directed on the box, but reserve about six Oreos for later use. Once mixed, pour it into your greased pan and spread it evenly. This brownie base will form a fudgy foundation that beautifully complements the creamy cheesecake layer above.
Step 2: Bake the Brownies
Place your brownie base in the oven and bake according to package instructions until set but still soft in the middle—usually around 20 minutes. It’s essential not to overbake them; we want that chewy texture! While they’re baking, take time to prepare your cheesecake layer.
Step 3: Make the Cheesecake Filling
In a mixing bowl, combine softened cream cheese, granulated sugar, egg, vanilla extract, and sour cream. Beat until everything is smooth and creamy. This mixture should be light and airy because it will create that luscious layer atop your brownies!
Step 4: Assemble Your Layers
Once your brownie base is baked and slightly cooled, pour the cheesecake filling over it evenly. Now crumble those reserved Oreos over the top of this mixture for added texture and flavor. Gently press them down into the filling for an even distribution.
Step 5: Bake Again
Return your pan to the oven and bake for an additional 30–35 minutes until set. You’ll know it’s ready when there’s just a slight jiggle in the center; this ensures it’s perfectly creamy once cooled.
Step 6: Prepare Ganache Topping
While your bars cool down slightly after baking, heat heavy whipping cream until just simmering then pour it over chocolate chips in a bowl. Let it sit for about five minutes before stirring until smooth. This luxurious ganache will give your dessert its final touch of decadence!
Step 7: Finish Up
Spread your ganache over cooled bars evenly for that glossy finish! Chill in the refrigerator for at least two hours before cutting into squares—this allows everything to set properly so you can achieve clean cuts.
And there you have it! Your Brownie Cheesecake Bars are ready to be devoured—enjoy every blissful bite!
Pro Tips for Making Brownie Cheesecake Bars
Making these Brownie Cheesecake Bars is a delightful journey that combines the best of both brownies and cheesecake. Here are some tips to ensure your bars turn out perfectly every time!
– Use room temperature ingredients: Allow the cream cheese and egg to sit at room temperature for about 30 minutes before mixing. This helps achieve a smoother cheesecake batter without lumps.
– Crush Oreos evenly: For the ganache topping, make sure the Oreo pieces are crushed into small, even pieces. This will create a uniform texture and enhance the overall flavor in each bite.
– Don’t skip the cooling step: After baking, let the bars cool completely in the pan before cutting them into squares. This helps set the layers and makes it easier to slice without crumbling.
– Adjust baking time based on your oven: Since ovens can vary in temperature, keep an eye on your bars towards the end of the baking time. They should be firm but still slightly jiggly in the center when done.
– Use parchment paper: Lining your baking pan with parchment paper makes clean-up easier and helps prevent sticking, ensuring you get beautiful bars every time.
How to Serve Brownie Cheesecake Bars
These Brownie Cheesecake Bars are not only delicious but also visually stunning. When it comes to serving them, think about how to elevate their presentation for any occasion.
Garnishes
– Whipped cream: A dollop of freshly whipped cream on top adds a lightness that balances out the richness of the bars.
– Chopped nuts: Sprinkle some chopped walnuts or pecans for added crunch and a nutty flavor that complements chocolate beautifully.
Side Dishes
– Fresh berries: Serve with a side of fresh strawberries or raspberries for a pop of color and freshness that cuts through the sweetness.
– Ice cream: A scoop of vanilla or dairy-free ice cream makes for a classic pairing that everyone loves.
– Coffee or tea: A warm cup of coffee or herbal tea pairs perfectly with these decadent dessert bars, making for a cozy after-dinner treat.
Make Ahead and Storage
These Brownie Cheesecake Bars are perfect for meal prep! You can make them ahead of time and enjoy them later. Here’s how to store them correctly:
Storing Leftovers
– Store in an airtight container at room temperature for up to 3 days.
– For longer freshness, refrigerate them where they can last up to one week.
Freezing
– Wrap individual bars tightly in plastic wrap and then place them in a freezer-safe bag.
– They can be frozen for up to 3 months without losing their delicious flavor and texture.
Reheating
– To enjoy warm brownies, microwave each bar for about 10-15 seconds until just warmed through.
– Avoid reheating more than once to maintain quality.
FAQs
If you have questions about making these Brownie Cheesecake Bars, you’re not alone! Here are some common inquiries:
Can I use low-fat cream cheese?
Yes, you can use low-fat cream cheese if you’d like a lighter version. Just keep in mind that it might affect the texture slightly but will still be delicious!
Can I substitute sour cream?
Absolutely! You can replace sour cream with plain yogurt or even dairy-free yogurt if you’re looking for a non-dairy option.
How do I know when my bars are done baking?
Your bars are done when they look set around the edges but still have a slight jiggle in the center. They will continue cooking as they cool down.
Can I use different flavors of Oreos?
Definitely! Feel free to experiment with different Oreo flavors like mint or peanut butter for a fun twist on this classic dessert.
Final Thoughts
I hope you’re excited to try making these Brownie Cheesecake Bars! With their rich layers and indulgent flavors, they’re sure to impress anyone lucky enough to taste them. Don’t hesitate—get baking today! Enjoy every bite!
Brownie Cheesecake Bars
Ingredients
Method
- Preheat your oven according to the brownie mix instructions. Grease your 9x13-inch baking pan. Prepare the brownie mix as directed on the box, reserving about six Oreos for later use. Pour it into your greased pan and spread it evenly.
- Place your brownie base in the oven and bake according to package instructions until set but still soft in the middle, usually around 20 minutes.
- In a mixing bowl, combine softened cream cheese, granulated sugar, egg, vanilla extract, and sour cream. Beat until smooth and creamy.
- Once your brownie base is baked and slightly cooled, pour the cheesecake filling over it evenly. Crumble the reserved Oreos over the top and gently press them down.
- Return your pan to the oven and bake for an additional 30–35 minutes until set, with a slight jiggle in the center.
- Heat heavy whipping cream until just simmering, then pour it over chocolate chips in a bowl. Let it sit for about five minutes before stirring until smooth.
- Spread your ganache over cooled bars evenly. Chill in the refrigerator for at least two hours before cutting into squares.
Leave a Comment