When it comes to quick and satisfying meals, Crispy Gochujang Korean Tofu holds a special place in my heart. This dish is not only bursting with flavor but also offers a delightful crunch that makes every bite a joy. Whether you’re looking for a cozy weeknight dinner or an impressive dish for friends, this recipe fits the bill perfectly. You can whip it up in no time and serve it alongside your favorite veggies and rice, making it versatile for any occasion.
What I love most about this recipe is how easy it is to customize. The combination of spicy gochujang and savory soy sauce creates a deliciously addictive glaze that pairs wonderfully with tofu. Trust me, once you try this Crispy Gochujang Korean Tofu, it will quickly become one of your go-to meals!
Why You’ll Love This Recipe
– Simple preparation: This recipe comes together in just 45 minutes, making it perfect for busy weeknights.
– Flavor-packed: The unique blend of gochujang and sesame oil delivers an explosion of taste that will leave you wanting more.
– Vegan-friendly: With plant-based ingredients, this dish caters to various dietary preferences.
– Versatile serving options: Enjoy it over rice, in a wrap, or as part of a vibrant salad – the possibilities are endless!
– Health-conscious choice: With minimal fat and plenty of protein, this dish is both nutritious and satisfying.
Ingredients You’ll Need
Gathering the right ingredients is key to creating delicious Crispy Gochujang Korean Tofu. Here’s what you’ll need to get started on this flavorful journey:
For the Tofu
– 1 16 ounce block extra firm tofu
– 1 tablespoon tamari or soy sauce
– 1 tablespoon cornstarch
– 3 tablespoons gluten free breadcrumbs (can sub regular breadcrumbs)
For the Sauce
– 1/4 cup low sodium tamari or soy sauce
– 1/4 cup gochujang/red chili paste (be sure to check if GF!)
– 1 tablespoon tomato paste
– 2 tablespoons vegetable broth or water
– 3 tablespoons honey (sub maple syrup for vegan)
– 1 tablespoon toasted sesame oil
– 1 tablespoon rice vinegar
– 2 teaspoons minced garlic
– 1 teaspoon fresh grated ginger
– 1 teaspoon cornstarch
– 1 teaspoon water
Variations
One of the best things about cooking is the ability to make dishes your own. Here are some fun variations you can try with this recipe:
– Swap the sweetener: Use agave syrup instead of honey or maple syrup for a different flavor profile.
– Add vegetables: Toss in some diced bell peppers or zucchini before baking for added nutrition and color.
– Try different toppings: Experiment with avocado slices, sesame seeds, or green onions on top for extra texture and flavor.
– Serve with different grains: Instead of white rice, try quinoa or brown rice for a nuttier taste.
How to Make Crispy Gochujang Korean Tofu
Step 1: Preheat Your Oven
Preheat the oven to 400 degrees Fahrenheit. This step is crucial because starting with a hot oven ensures that your tofu will bake evenly and become perfectly crispy.
Step 2: Prepare the Tofu
Remove the tofu from its package and drain off any excess liquid. Wrap it in a towel and lightly press down on it to absorb additional moisture. This helps achieve that desired crispy texture during baking.
Step 3: Cut and Coat
Cut the tofu into approximately one-inch cubes and add them to a mixing bowl. Toss gently with tamari or soy sauce first; then sprinkle in cornstarch followed by breadcrumbs, ensuring each piece is well coated. This coating process adds both flavor and crunch.
Step 4: Arrange on Baking Sheet
Place the coated tofu cubes on a baking sheet lined with parchment paper, ensuring they are spaced apart. Avoiding contact between pieces allows them to crisp up rather than steam during baking.
Step 5: Bake
Bake in the preheated oven for about 25 minutes. After that time has elapsed, turn off the oven but let the tofu sit inside for another five minutes. This residual heat helps achieve maximum crispiness without burning.
Step 6: Make the Sauce
While your tofu bakes, whisk together all sauce ingredients (except for water and cornstarch) in a small pot over medium heat until combined. In another small bowl, mix cornstarch with water until smooth; add this mixture to your pot. Cook while whisking until the sauce bubbles and thickens before removing from heat.
Step 7: Toss and Serve
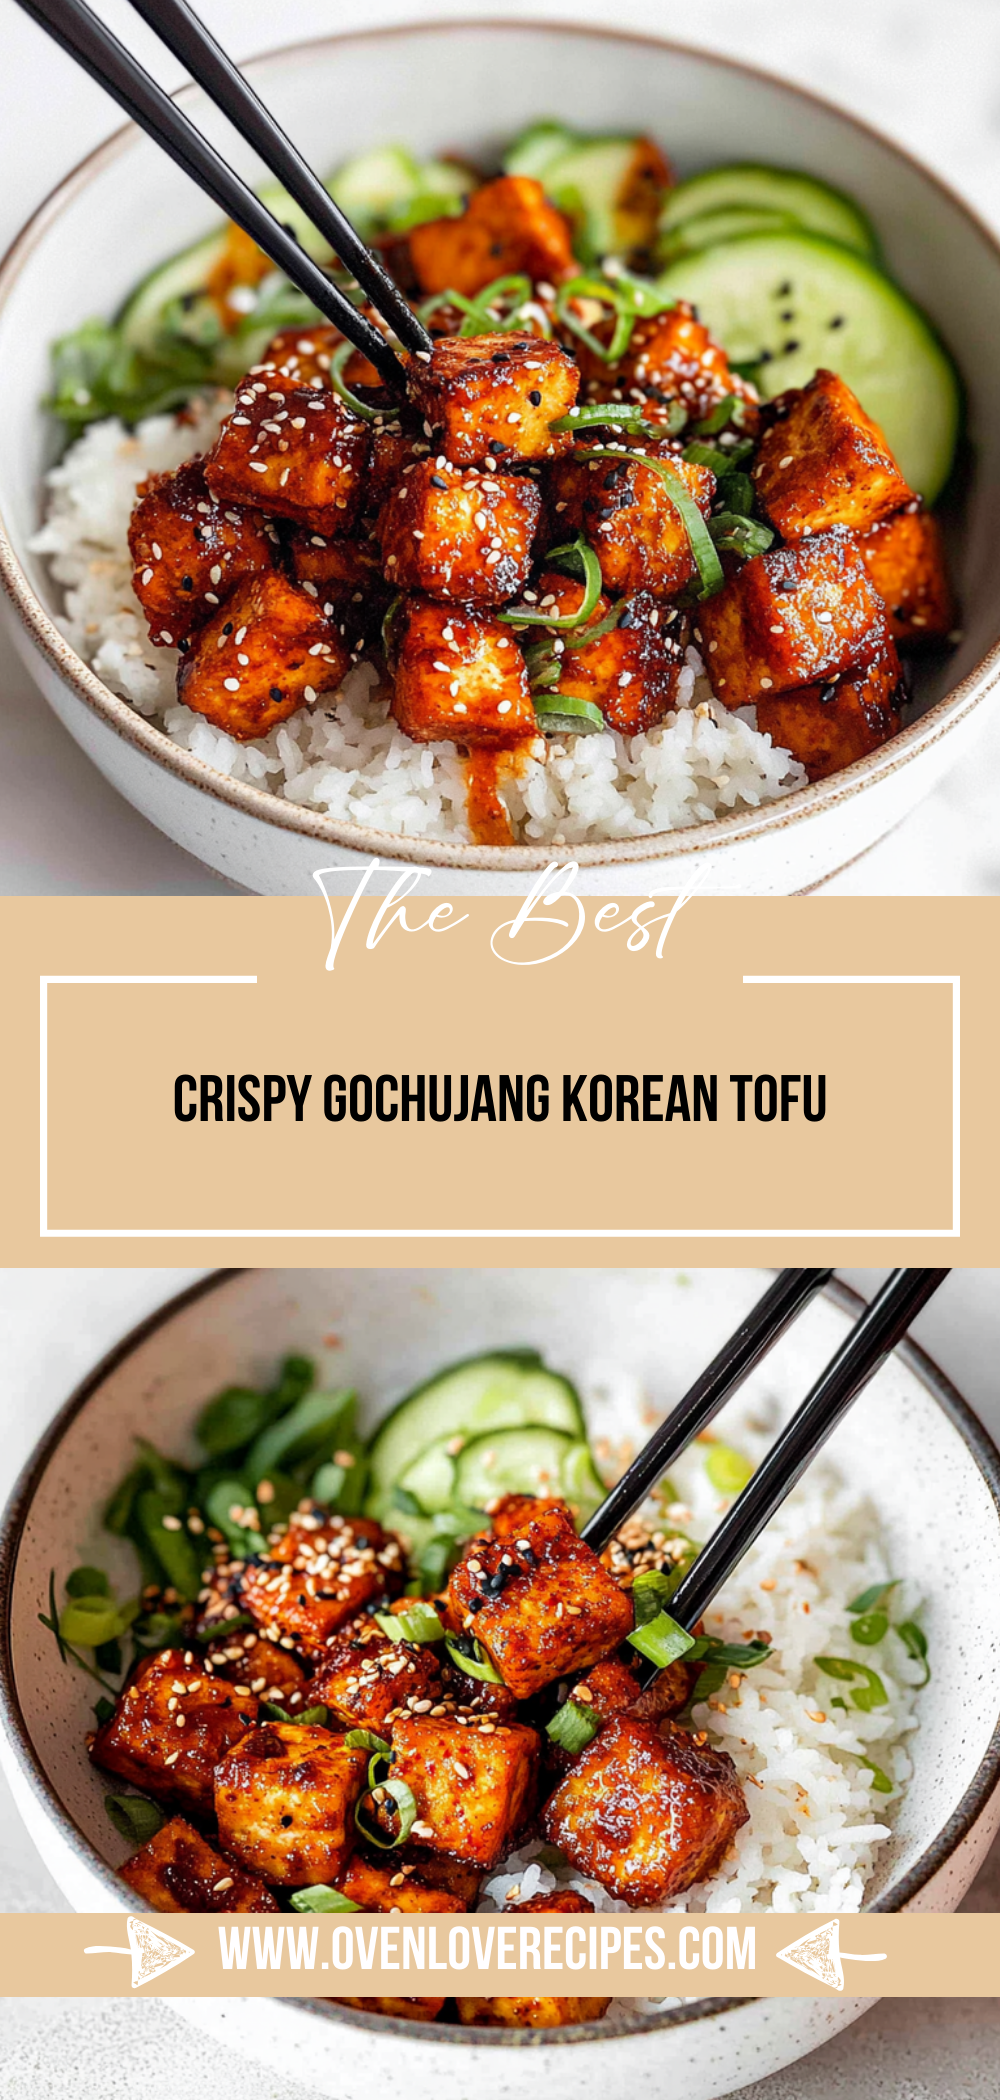
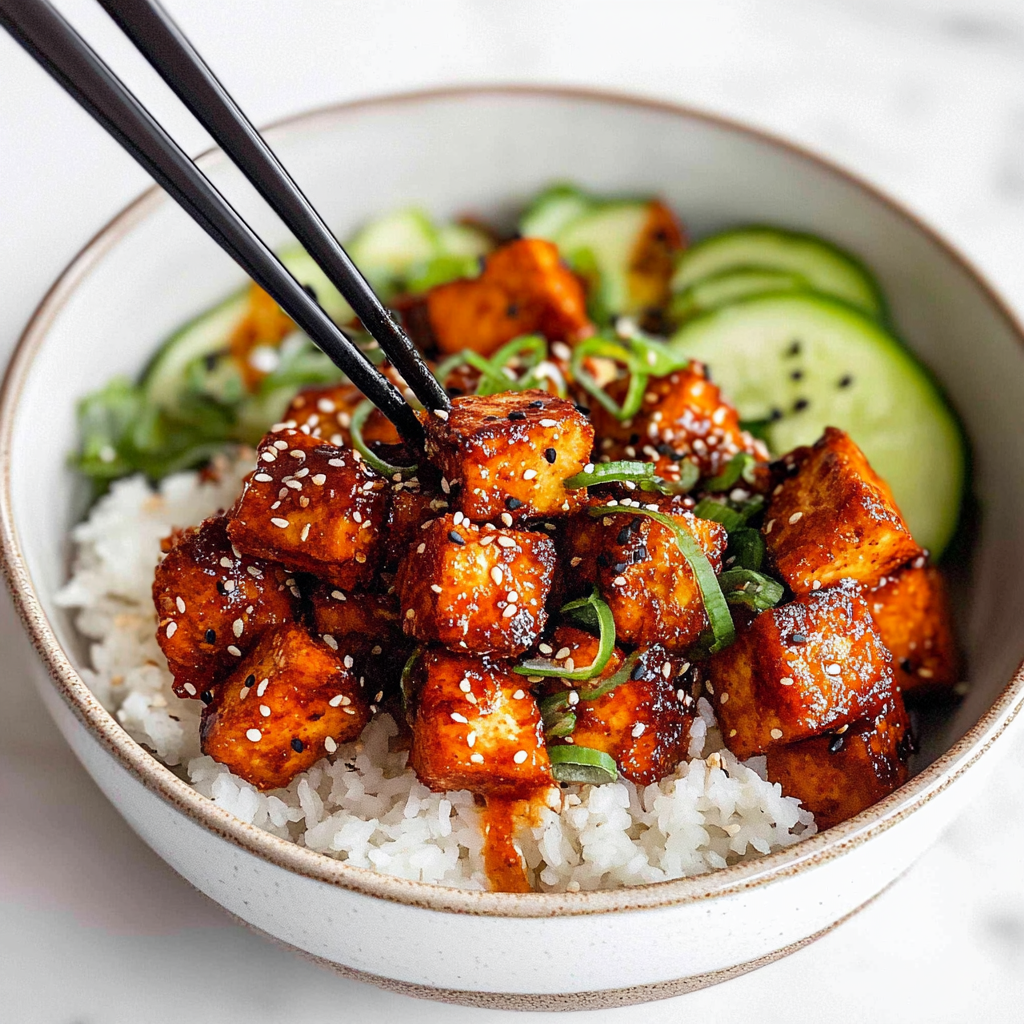
Once your tofu has cooled slightly after baking, transfer it into a bowl and toss gently with half of your prepared sauce until well coated. Reserve the remaining sauce for serving later. You can serve your crispy tofu over rice accompanied by fresh veggies like cucumber, carrot, avocado, or even broccoli for an extra nutritional boost!
Enjoy every last bite of your delicious Crispy Gochujang Korean Tofu!
Pro Tips for Making Crispy Gochujang Korean Tofu
Making crispy Gochujang Korean tofu at home is a delightful experience! Here are some tips to ensure your tofu turns out perfectly crispy and flavorful every time.
– Use extra firm tofu: Extra firm tofu has less water content, which helps achieve that ideal crispiness. Don’t skimp on the pressing step—removing excess moisture is key!
– Coat evenly: Make sure each tofu cube is well coated with soy sauce, cornstarch, and breadcrumbs. This will ensure a uniform crunch and flavor throughout.
– Avoid overcrowding: When placing your tofu on the baking sheet, ensure that the pieces do not touch one another. This allows hot air to circulate around each piece, leading to even crisping.
– Bake until golden: Keep an eye on your tofu as it bakes. You want it to be golden brown and crispy, so don’t hesitate to let it bake a little longer if needed.
– Customize your sauce: Feel free to adjust the spice level of the sauce by adding more or less gochujang according to your taste preference. A touch of sesame seeds can also enhance the flavor.
How to Serve Crispy Gochujang Korean Tofu
Serving crispy Gochujang Korean tofu is all about presentation and pairing it with complementary flavors. Here are some ideas for making your dish truly shine!
Garnishes
– Sliced green onions: Freshly chopped green onions add a nice pop of color and a mild onion flavor that complements the dish beautifully.
– Toasted sesame seeds: A sprinkle of toasted sesame seeds adds a lovely crunch and nutty flavor that pairs wonderfully with gochujang.
– Cilantro leaves: Fresh cilantro can elevate the dish with its bright taste, adding freshness that balances the rich flavors.
Side Dishes
– Steamed broccoli: The slight bitterness of broccoli contrasts nicely with the sweet and spicy tofu.
– White rice: Fluffy white rice serves as the perfect base for soaking up the delicious sauce.
– Kimchi: A side of tangy kimchi adds an authentic Korean touch while providing probiotics and depth of flavor.
– Cucumber salad: A refreshing cucumber salad can help cleanse the palate between bites.
Make Ahead and Storage
Meal prepping can make weeknight dinners a breeze! Here’s how you can store your leftovers or prepare in advance.
Storing Leftovers
– Allow leftover tofu to cool completely before transferring it to an airtight container to maintain its texture.
– Store in the refrigerator for up to 3 days. Reheat gently to avoid losing crispness.
Freezing
– For best results, freeze uncooked coated tofu cubes before baking. Place them in a single layer on a baking sheet until frozen, then transfer to a freezer bag.
– Freeze for up to 2 months. When ready, bake from frozen but increase cooking time slightly.
Reheating
– To reheat, place leftover tofu in a preheated oven at 375 degrees Fahrenheit for about 10–15 minutes until heated through and crispy again.
– You can also reheat in an air fryer at 350 degrees Fahrenheit for about 5 minutes.
FAQs
If you have questions about making crispy Gochujang Korean tofu, you’re not alone! Here are some common inquiries:
Can I use regular breadcrumbs instead of gluten-free?
Yes, you can substitute regular breadcrumbs for gluten-free ones without affecting the overall texture or flavor of the dish.
Is this recipe spicy?
The spice level depends largely on how much gochujang you use. If you’re sensitive to heat, start with less gochujang and gradually increase according to your taste preferences.
Can I prepare the sauce ahead of time?
Absolutely! You can make the sauce ahead of time and store it in an airtight container in the fridge for up to one week. Just give it a good stir before using.
Final Thoughts
I hope you enjoy making this crispy Gochujang Korean tofu as much as I do! It’s such a fun dish packed with vibrant flavors that everyone will love. Don’t hesitate to try different sides or garnishes; it’s all about what makes you happy at mealtime. Happy cooking!
Crispy Gochujang Korean Tofu
Ingredients
Method
- Preheat the oven to 400 degrees Fahrenheit.
- Remove the tofu from its package and drain off any excess liquid. Wrap it in a towel and lightly press down on it to absorb additional moisture.
- Cut the tofu into approximately one-inch cubes and add them to a mixing bowl. Toss gently with tamari or soy sauce first; then sprinkle in cornstarch followed by breadcrumbs.
- Place the coated tofu cubes on a baking sheet lined with parchment paper, ensuring they are spaced apart.
- Bake in the preheated oven for about 25 minutes. After that time has elapsed, turn off the oven but let the tofu sit inside for another five minutes.
- While your tofu bakes, whisk together all sauce ingredients (except for water and cornstarch) in a small pot over medium heat until combined. In another small bowl, mix cornstarch with water until smooth; add this mixture to your pot. Cook while whisking until the sauce bubbles and thickens before removing from heat.
- Once your tofu has cooled slightly after baking, transfer it into a bowl and toss gently with half of your prepared sauce until well coated. Reserve the remaining sauce for serving later.

Leave a Comment